SSO für Google Admin
Diese Anleitung zeigt Ihnen, wie Sie SSO für BuiltWith Pro von Google Admin aus aktivieren.
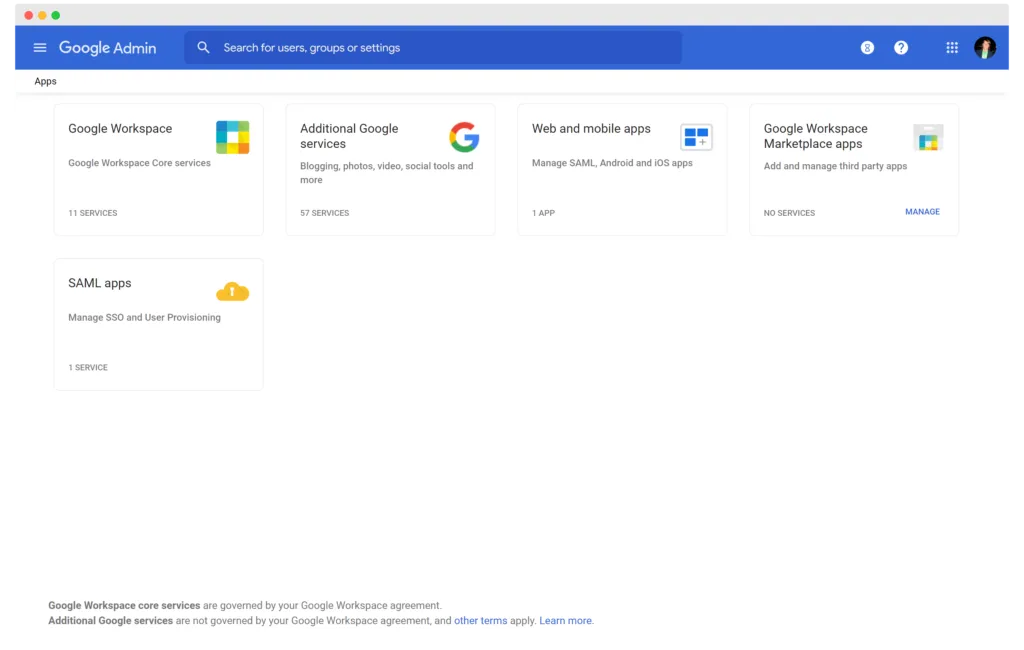
Schritt 1: Wählen Sie SAML-Apps unter „Apps“ auf Ihrer Google Admin-Oberfläche aus.
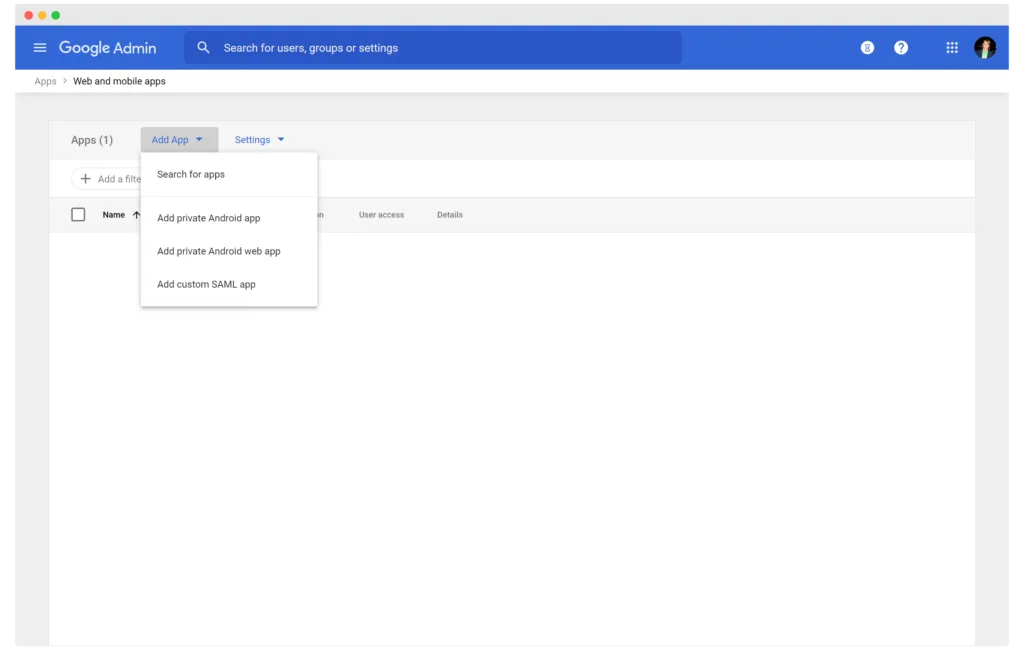
Schritt 2: Wählen Sie „Benutzerdefinierte SAML-App hinzufügen“ aus dem Dropdown-Menü „App hinzufügen“ -
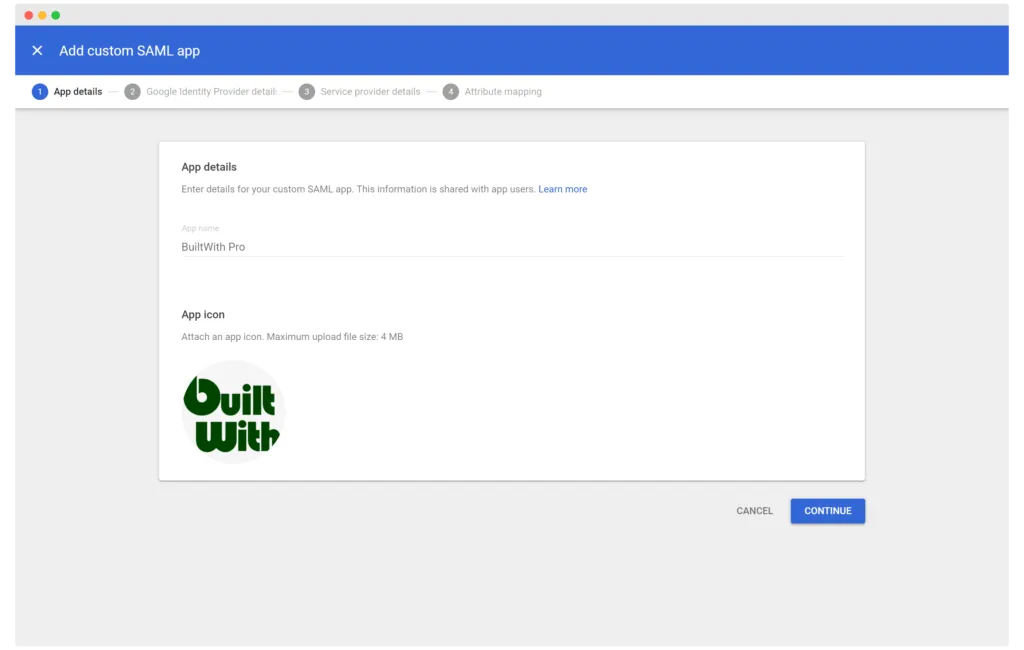
Schritt 3: Geben Sie BuiltWith Pro (oder einen Namen, den Sie der Integration geben möchten) und unser Logo ein.
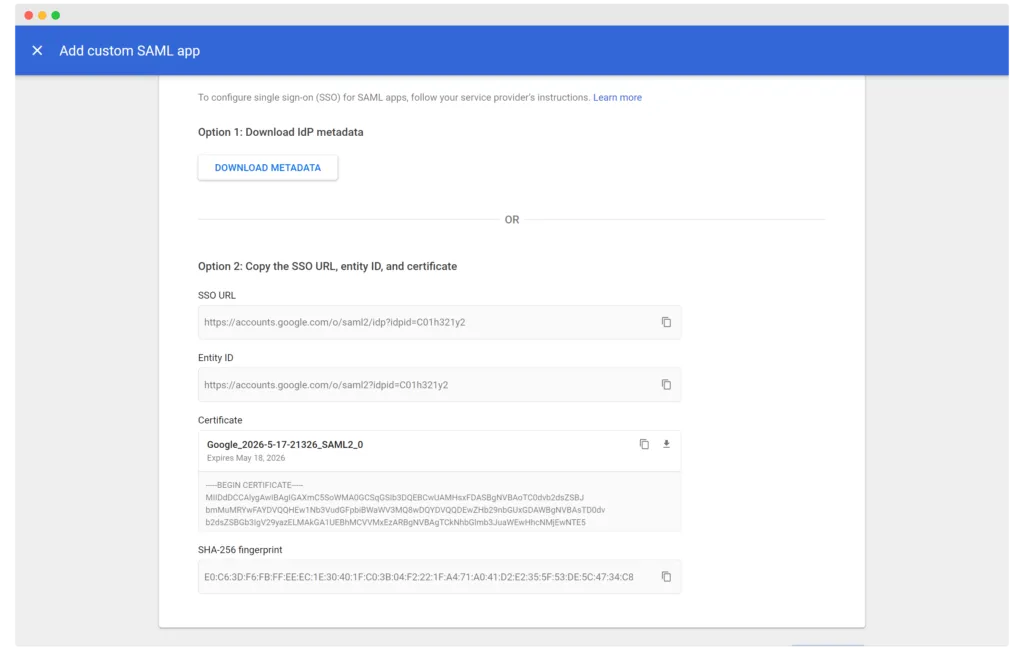
Schritt 4: Senden Sie uns eine E-Mail an support@builtwith.com mit der SSO-URL, der Entity-ID und dem Zertifikat, das Google Admin erstellt
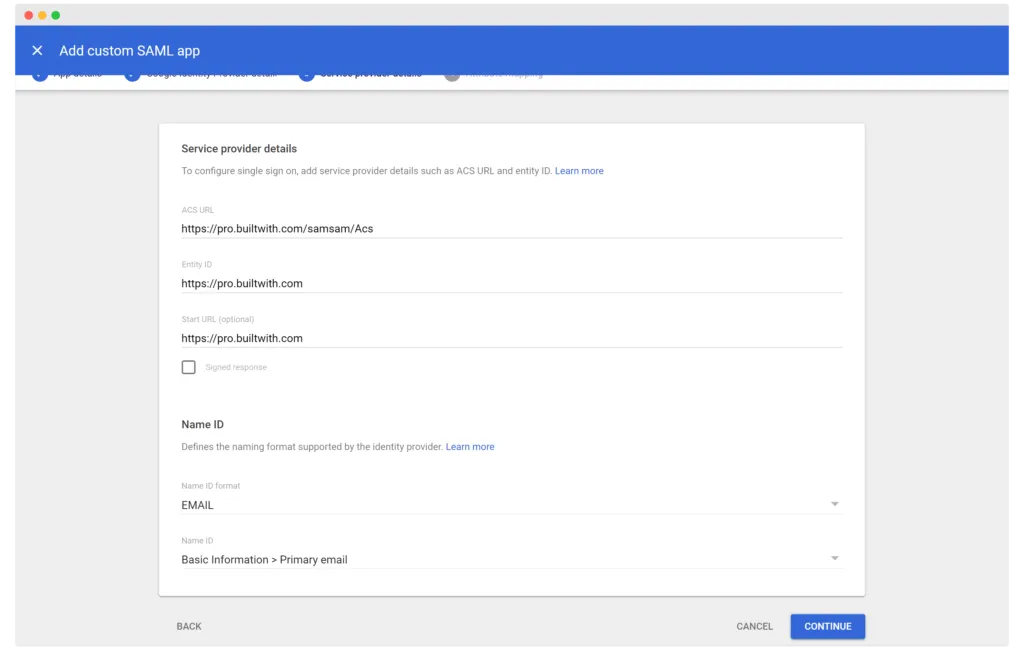
Schritt 5: Servicedetails -
ACS-URL
https://pro.builtwith.com/samsam/Acs
Entitäts-ID
https://pro.builtwith.com
Start-URL
https://pro.builtwith.com
Namens-ID-Format
E-MAIL
Namens-ID
Grundlegende Informationen > Primäre E-Mail
Wenn wir bestätigt haben, dass wir Ihre Daten zu unserem System hinzugefügt haben, sind Sie fertig.