SSO for Google Admin
This guide shows you how to enable SSO for BuiltWith Pro from Google Admin.
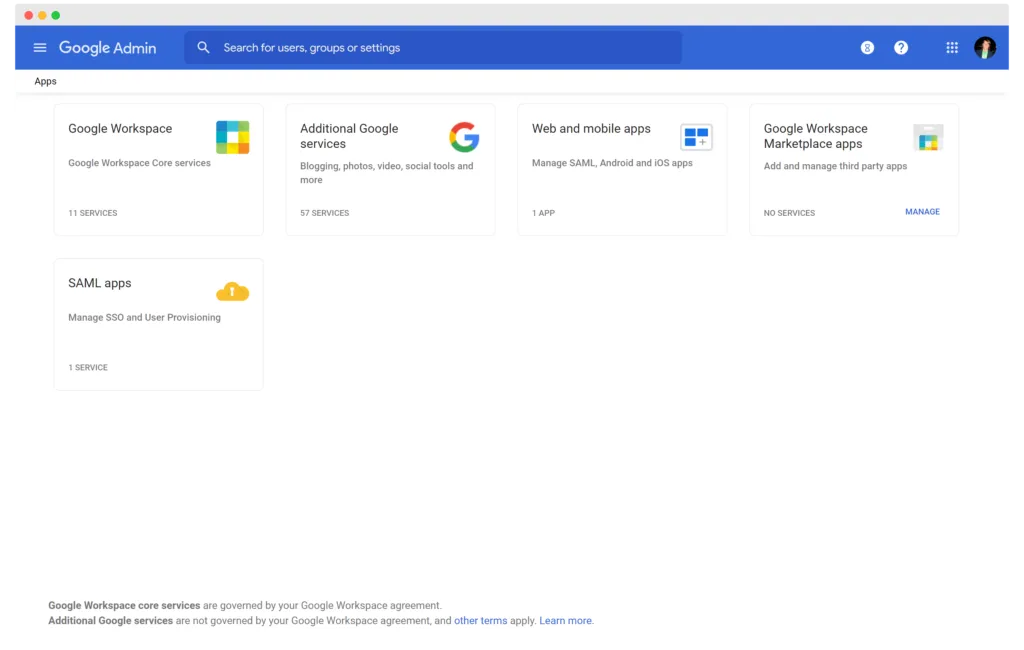
Step 1: Select SAML Apps from 'Apps' on your Google Admin interface.
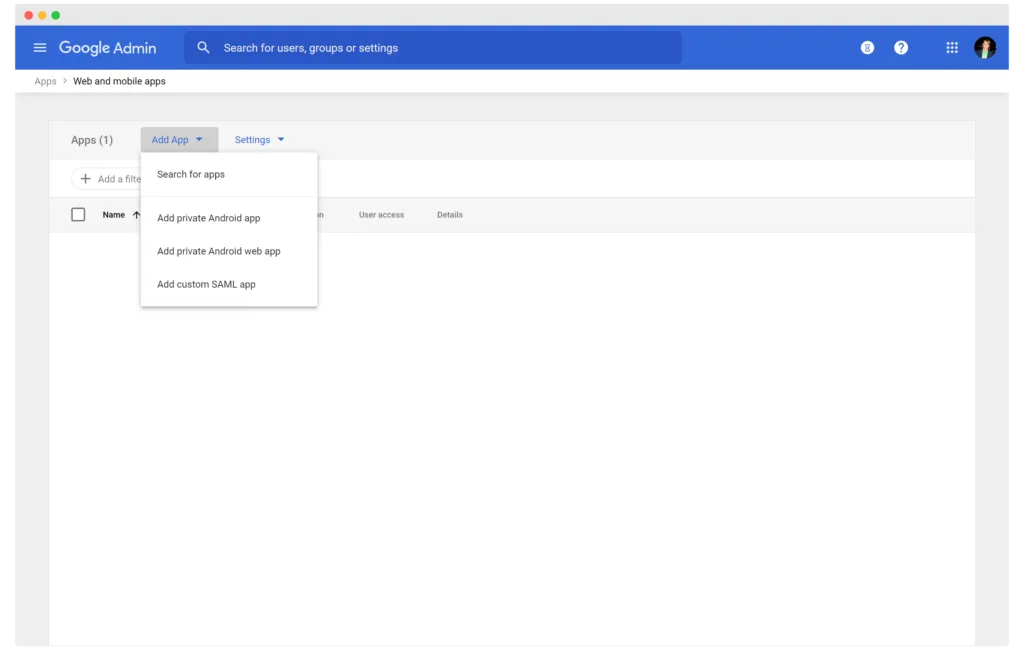
Step 2: Select 'Add custom SAML app' from the 'Add App' dropdown -
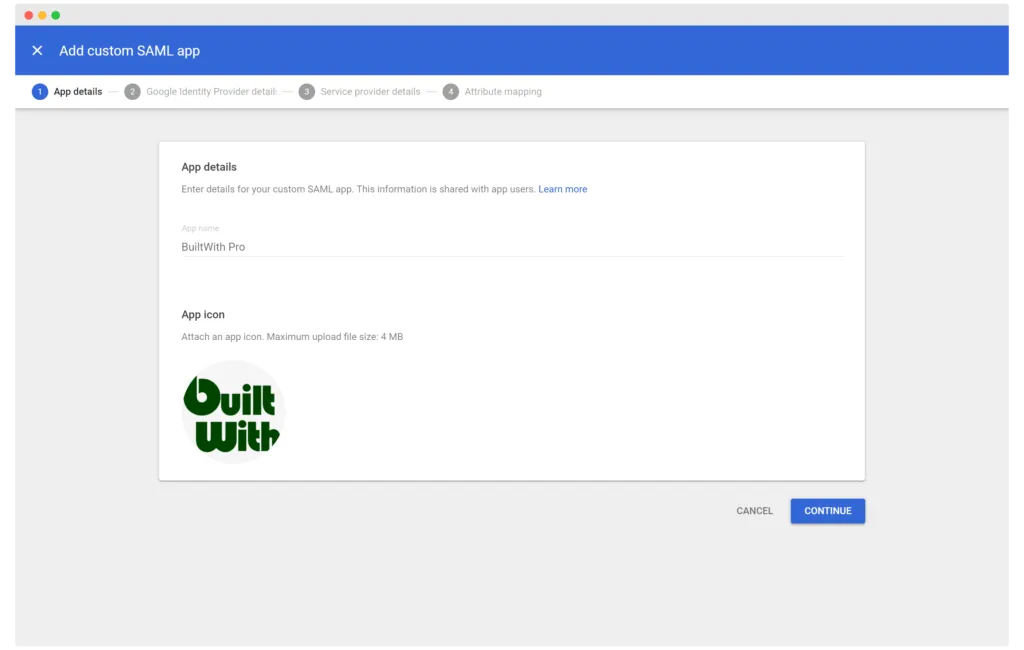
Step 3: Enter BuiltWith Pro (or a name you'd like to call the integration) and our logo.
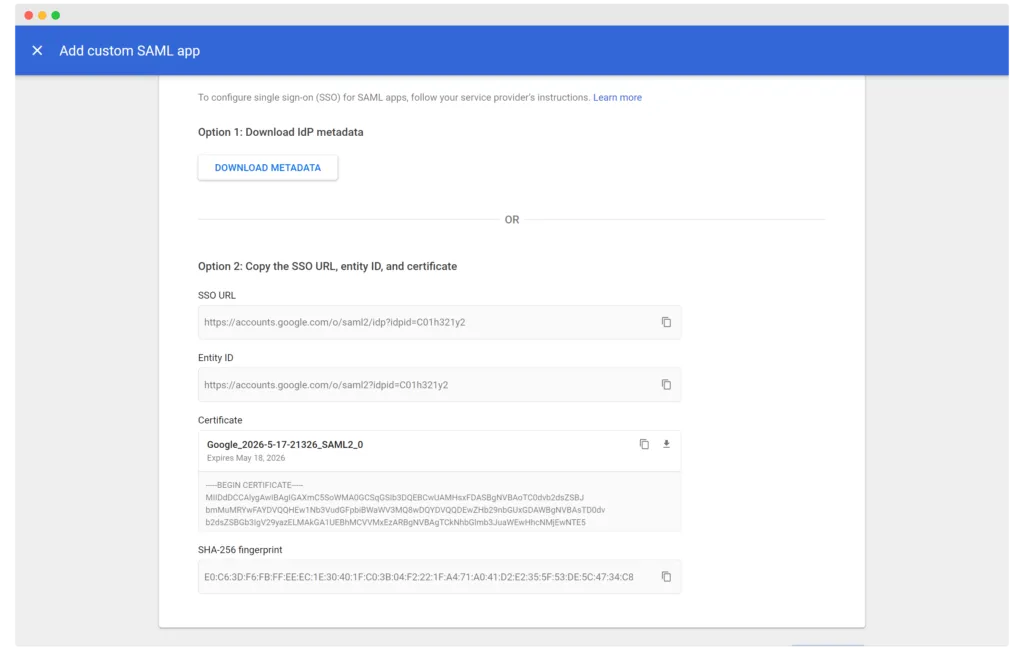
Step 4: Send us an email at support@builtwith.com with the SSO URL, Entity ID and the Certificate that Google Admin creates
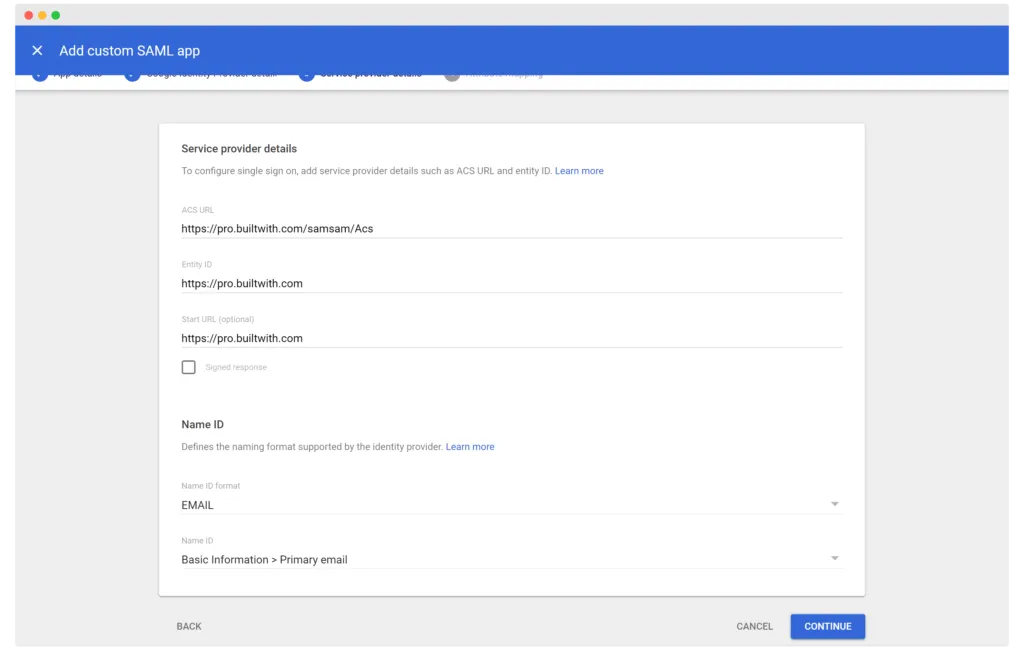
Step 5: Service Details -
ACS URL
https://pro.builtwith.com/samsam/Acs
Entity ID
https://pro.builtwith.com
Start URL
https://pro.builtwith.com
Name ID format
EMAIL
Name ID
Basic Information > Primary email
When we've confirmed we added your details to our system you will be all set.